📅 April 14, 2016
 What? You added a new user to your Linux system from the terminal and his login does not appear on the login screen? No default directories in his home? He cannot login?
If you have read about command-line user management or studied for Linux+ certification, you no doubt have learned the “official” way to add a new user to a system with useradd.
That might be fine for a certification test, but the real world differs. Various distributions might tweak the process to make it…well…different from what the books mention.
One such case is Linux Mint Cinnamon. Invoking useradd according to the book will not simply add a new user and away you go. There are a few extra steps involved to produce results comparable to the Users and Groups GUI dialog of Linux Mint.
Here are a few ideas that show how to create a new user from a terminal in Linux Mint 17.3 Cinnamon. This way, you can take the ideas and script them for multi-user creation.
The Standard Way
Entering
sudo useradd newuser
will not produce usable results in Linux Mint 17.3 Cinnamon. Sure, it creates a new user, but no user home is created and the account is locked.
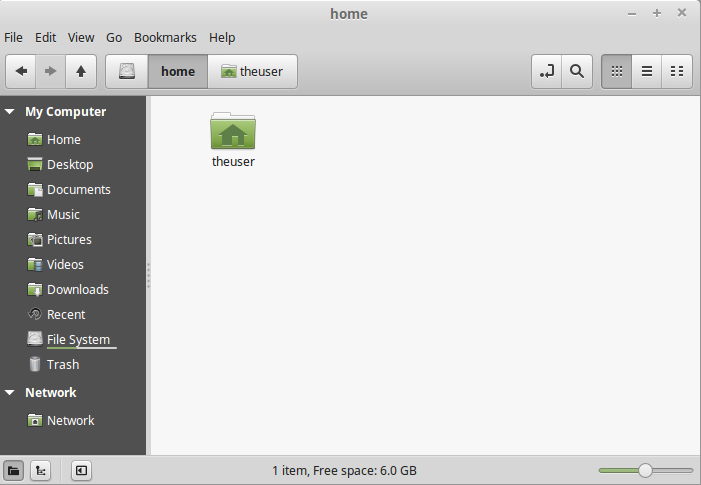
theuser is the administrator’s account. We added newuser, but no home directory was created. It does not appear.

Nor does newuser appear on the login screen following a switch user or reboot.
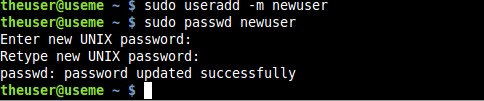
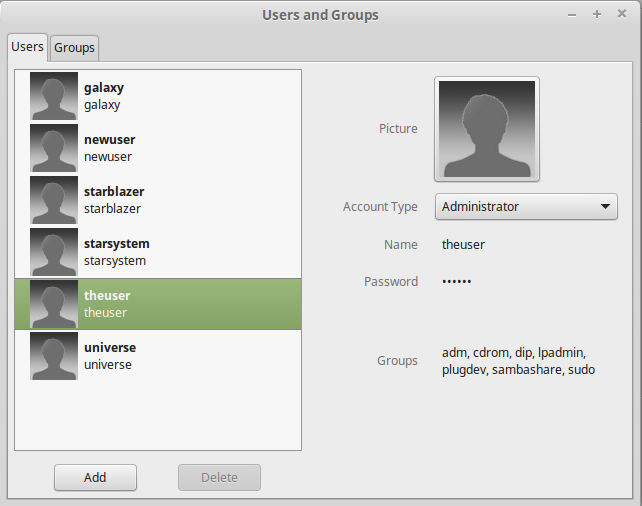
Using Users and Groups from System Settings, let’s remove newuser and try again from the terminal. We can add the -m option to create the home directory.
sudo useradd -m newuser
User newuser now has a home directory…
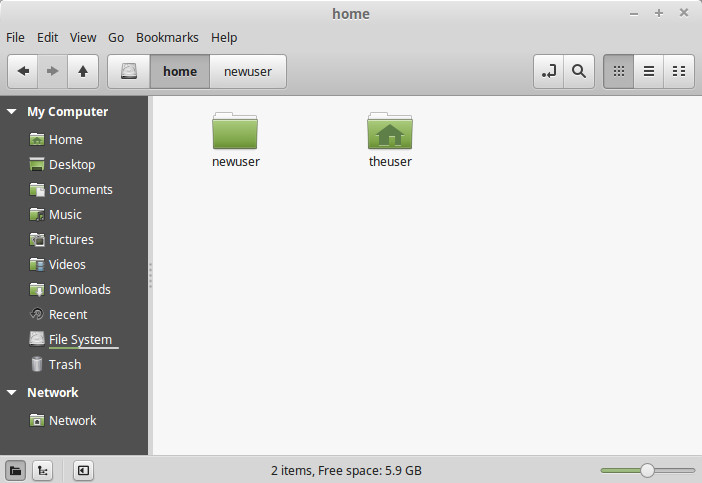
Viewing /home shows that the -m option creates a home directory for newuser.
…but it is empty. Where are the default folders, such as Desktop, Documents, and Music?
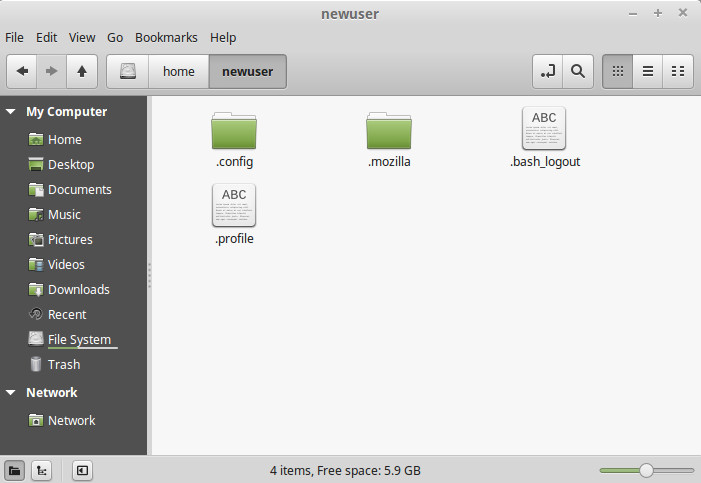
newuser’s home directory only shows a few hidden files and folders. (Hidden file viewing enabled here.)
Let’s delete newuser and try something else. If we add a new user from the Users and Groups dialog, we get the same empty home for the user.

Locate Users and Groups from System Settings. Users and Groups requires sudo privileges.
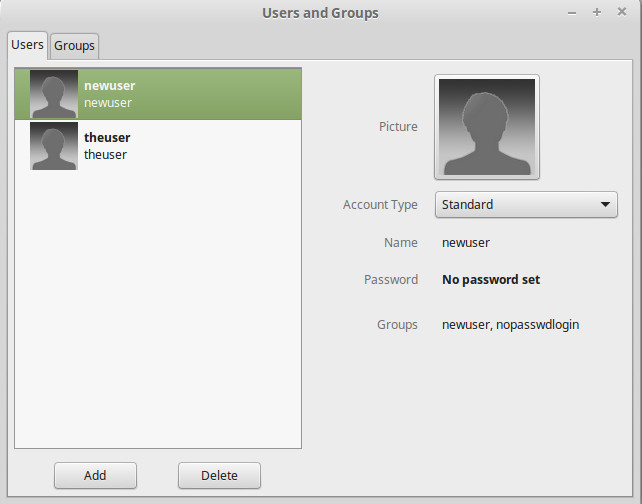
Here, we deleted the previous newuser and just created another newuser using this dialog. newuser appears as a standard account. Notice that there is no password set and that newuser is automatically a member of the nopasswdlogin group. By default, newuser can log in without entering a password.
Viewing newuser’s home directory shows that the same hidden files and folders are added, but nothing else.
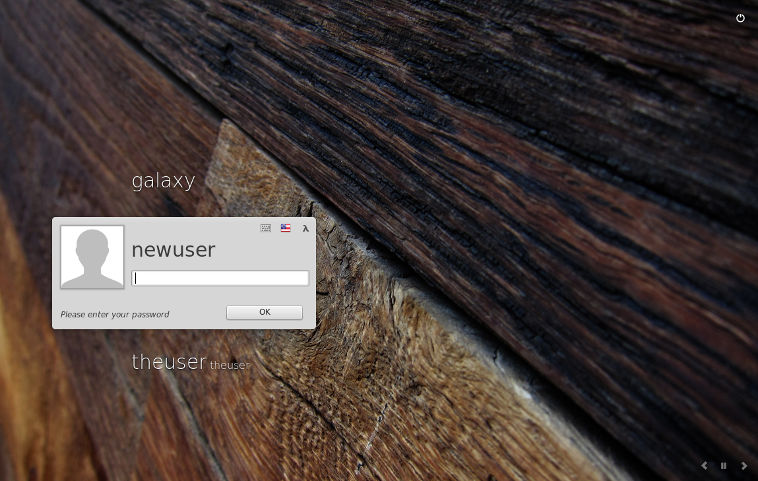
This is normal operation. The default folders, such as Documents and Videos, are not created until the user logs in for the first time. So, choose Switch User to return to the login screen.
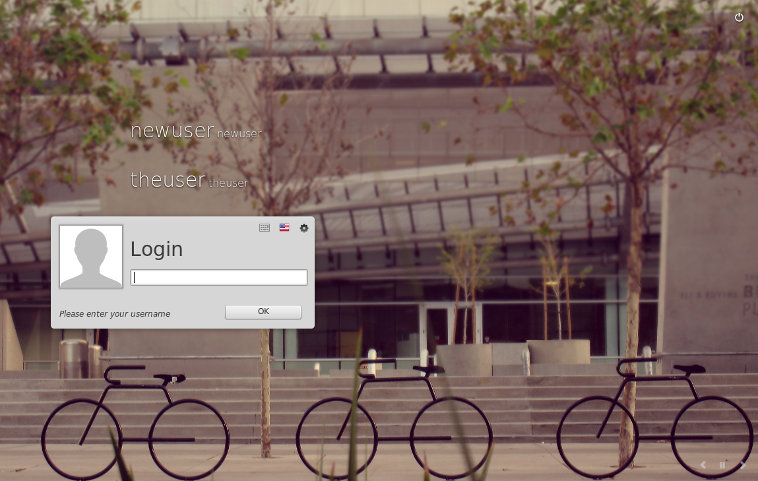
newuser appears on the login screen. However, the moment you select newuser, you will instantly log in without entering a password. Why? Recall that newuser is automatically a member of the nopasswdlogin group upon creation. Assigning newuser a password will remove that group membership and require that newuser enter a password to log in.
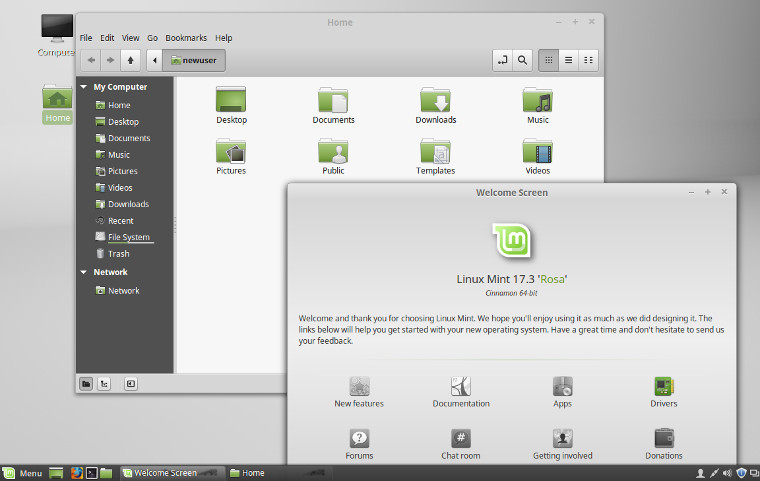
Upon logging in for the first time, the default folders are created for newuser, and the familiar Welcome Screen dialog is shown.
This is how adding a new user works in Linux Mint 17.3 Cinnamon. From Users and Groups, everything works fine, but we want to achieve similar results from the command line.
Delete newuser again using Users and Groups, and create newuser again from the command line:
sudo useradd -m newuser
We will see that we cannot login with this account, so no default directories get created aside from the hidden files and folders. Neither is newuser automatically added to the nopasswdlogin group.
Enabling a New User Account
By default, a new user is locked out. We must set a password and specify a shell. Enter
sudo passwd newuser
to manually specify a password, which unlocks the account (or enter sudo usermod -U newuser to unlock an account that already has a valid password).
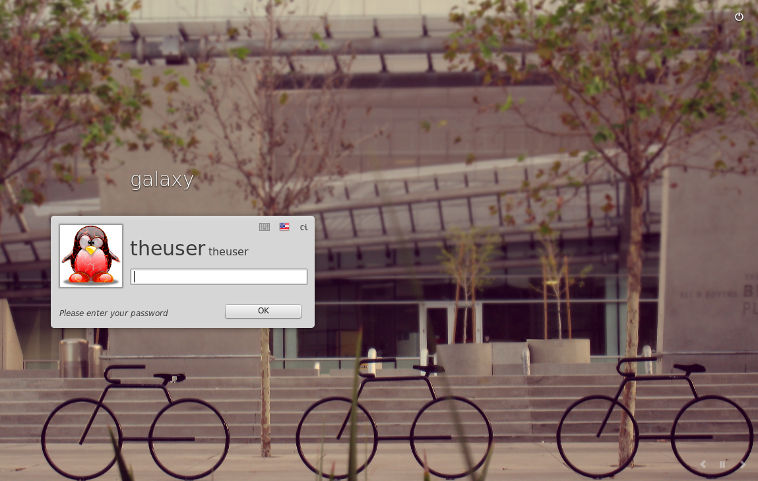
Return to the login screen using Switch User. newuser does not appear, but can we log in? try entering an invalid password to make the Login box appear. Enter the newuser username followed by his password.
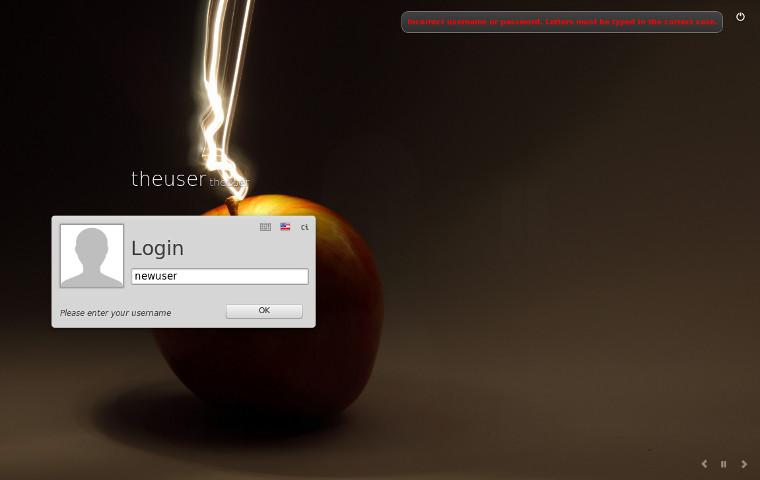
For users that do not appear, you can use the Login box and manually enter a username and password. We need to do this here because newuser created from the command line does not yet appear on the login screen.
After logging in for the first time, the default directories are created and the Welcome Screen is shown as before.

newuser will now appear on the login screen.
At this point, you might be thinking, “Great! Everything works now.”
Not really. The user addition is incomplete because the user lacks a specified shell in /etc/passwd. While SSH and su will work, it is good practice to specify a shell for the new user.
This works so far because the user logged in. We want to have a fully working login box from the start without the user needing to trigger Login. We need to specify a shell upon user addition.
Let’s remove newuser again using Users and Groups and create newuser again from the terminal and then assign a password.
sudo useradd -m newuser
sudo passwd newuser
Created newuser with a home directory and assigned a password.
But this is not enough. If you try to switch users and revisit the login screen, newuser will not appear.
Still no newuser login box. Where is his login box?
A shell, such as bash, is required for login, and it must be specified in /etc/passwd. Viewing /etc/passwd shows that a shell does not exist for newuser.
newuser:x:1002:1002::/home/newuser:<Shell should appear here, but it's missing.>
Above is a line from /etc/passwd – the < > text does not appear in /etc/passwd. That was added for clarification. The shell should be the last field, but it is empty. To add one, enter
sudo usermod -s /bin/bash newuser
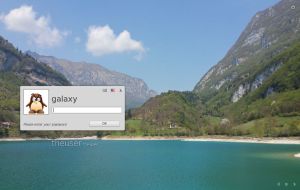
or specify a shell when the user account is created. (Below creates a new user named galaxy.)
sudo useradd -m -s /bin/bash galaxy
Viewing /etc/passwd shows a shell field for both new accounts.
newuser:x:1002:1002::/home/newuser:/bin/bash
galaxy:x:1003:1003::/home/galaxy:/bin/bash
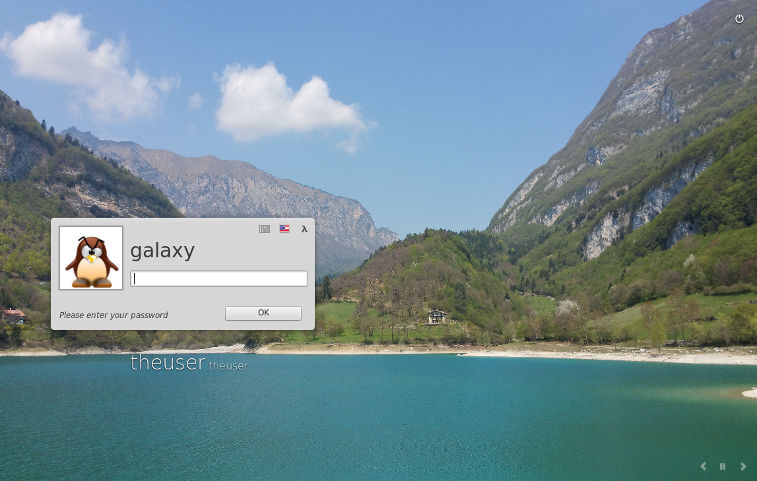
Now, newuser and user galaxy appear on the Linux Mint login screen.
Success! User accounts for newuser and galaxy now appear on the login screen.
We still cannot log into the accounts until each has a password. We can specify a password during account creations, so let’s do that next.
Add a Password During Creation
We can add a password during user creation with the return value of the crypt( ) function.
sudo useradd -m -p $(perl -e 'print crypt("PASSWORD", "blue")') -s /bin/bash universe
This creates a new user named universe with the password PASSWORD in upper case.
- -m Create a home directory (Copy contents from /etc/skel)
- -s /bin/bash Specify the Bash shell
- -p $(perl -e ‘print crypt(“PASSWORD”, “blue”)’) Generate a password.
This is meant to create a default temporary password for all users created with this command. If you use a bash script to set up several users like this, inform them to change their passwords from the default.
Of course, you can always be fancy and modify the script to generate a random password for each account.
With the shell and the password set, a user can now log in to his account.
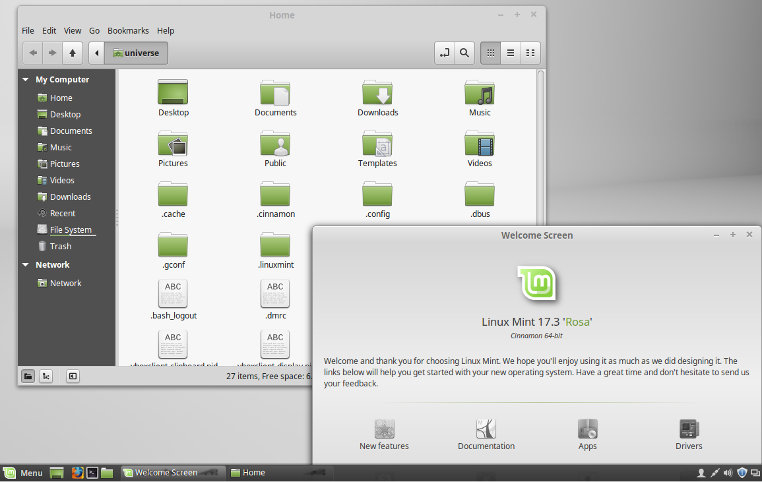
Viewing the universe user account upon the first login. All default files and folders are automatically created, and the Welcome Screen appears.
Skeletons in the Closet!
Where do all of those default folders come from?
How can we change them?
Can we add custom files and folders to all new accounts upon creation?
The answer is “Yes” to all of these questions. Linux provides a skeleton directory in /etc/skel that acts as a template. Anything there is automatically copied to a new user’s home directory upon creation whether created from the command line using useradd of created using Users and Groups.
By default, useradd copies the contents of /etc/skel (a template directory) into the new user’s home directory. Whatever appears in /etc/skel will appear in the new user’s home.
The homes for universe and galaxy are empty because /etc/skel is empty. Actually, it might already contain hidden files and folders depending upon what other programs you already have installed. For example, there should be a .mozilla folder in /etc/skel if you have Firefox installed.
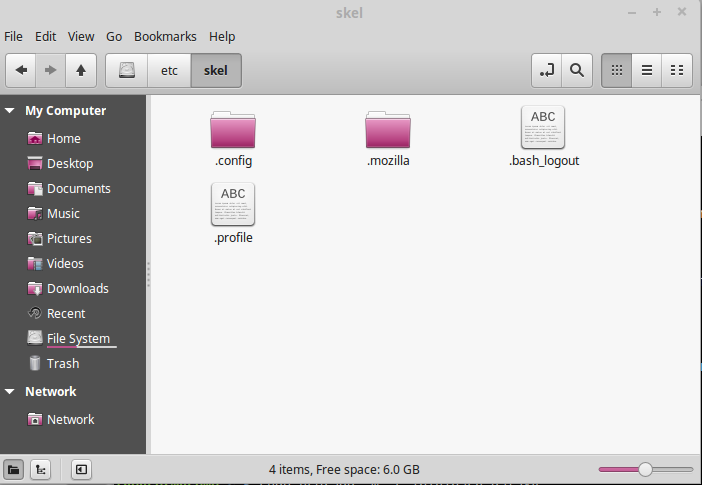
/etc/skel in a fresh installation of Linux Mint 17.3 Cinnamon. Shown are all hidden files. Since this is all /etc/skel contains, this is all that is copied to a new user’s account upon creation. Notice that the default folders, such as Documents and Videos, are not located here.
You can add whatever you like to /etc/skel. Welcome README files, music, directories, links…whatever you need.
Keep in mind that /etc/skel requires superuser permissions to access.
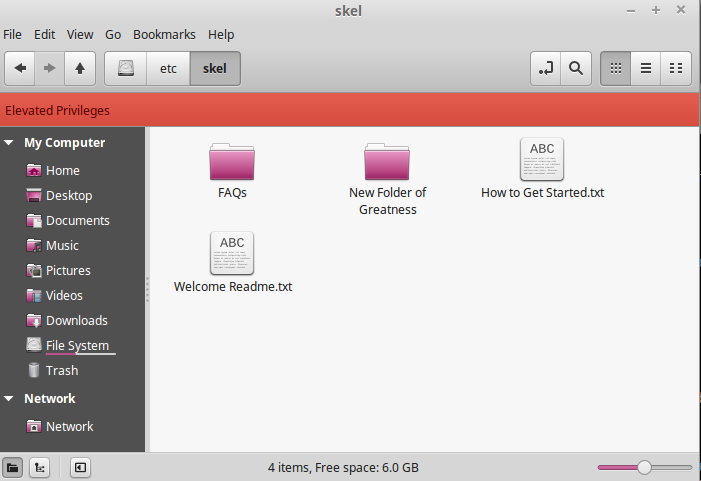
Nemo showing /etc/skel with sudo access (sudo nemo). Here, the hidden listing is off, and two custom folders and two custom text files have been added. Every new user will receive a COPY of these in his home directory.
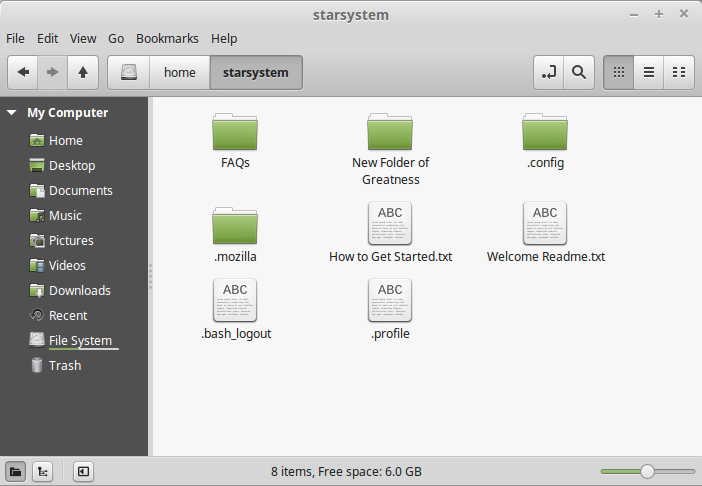
A new user named starsystem was created, and this is his home directory. He has not logged in yet, so the default folders do not appear. However, all contents of /etc/skel – including the hidden files – have been copied into starsystem’s home.
Where Are the Default Folders?
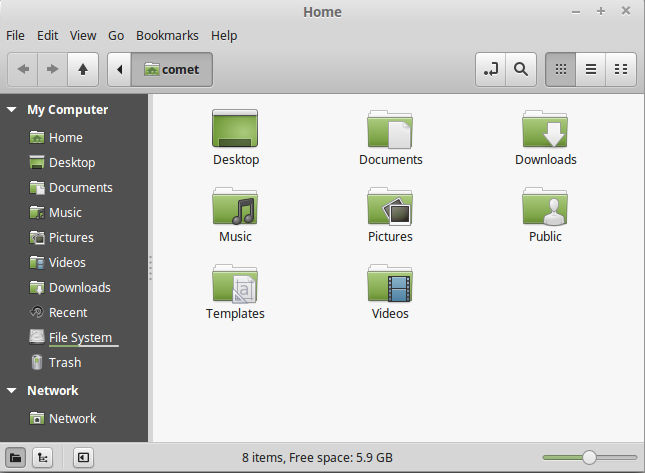
The default folders that appear for a new user. Where do these come from?
These are specified in the text file:
/etc/xdg/user-dirs.defaults
This file tells which directories to create by default upon the first login. It looks like this:
# Default settings for user directories
#
# The values are relative pathnames from the home directory and
# will be translated on a per-path-element basis into the users locale
DESKTOP=Desktop
DOWNLOAD=Downloads
TEMPLATES=Templates
PUBLICSHARE=Public
DOCUMENTS=Documents
MUSIC=Music
PICTURES=Pictures
VIDEOS=Videos
# Another alternative is:
#MUSIC=Documents/Music
#PICTURES=Documents/Pictures
#VIDEOS=Documents/Videos
You can comment out folders you do not wish to have, and you can add new folders as you like. For example,
#TEMPLATES=Templates
#PUBLICSHARE=Public
#DOCUMENTS=Documents
MYSTUFF=MyStuff
CLASSICS=Classics
MYSTERY=Mystery
Templates, Public, and Documents would not be included, but the three new folders, MyStuff, Classics, and Mystery would appear in every new user’s home.
This is combined with the contents of /etc/skel to create a default home directory for a new user.
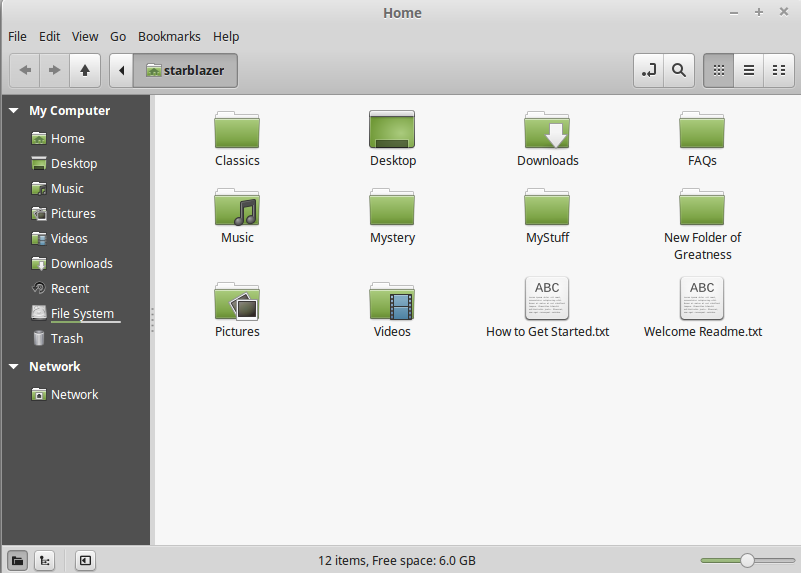
Here is the home for a new user named starblazer. Templates, Public, and Documents were commented out in the /etc/xdg/user-dirs.defaults file, so they do not appear. However, we see three new folders, MyStuff, Classics, and Mystery, since they were added to user-dirs.defaults.
Changes to /etc/xdg/user-dirs.defaults do not apply to existing users accounts unless you run xdg-user-dirs-update. Otherwise, only new accounts are affected with the latest changes.
Updating Existing Accounts
If you do make changes to /etc/xdg/user-dirs.defaults and wish to apply them to existing user accounts, then run
xdg-user-dirs-update
If you added any new folders in user-dirs.defaults, then those folders will be created in all user home directories. Existing folders are untouched, so if you comment out an existing directory it will not be deleted.
See man xdg-user-dirs-update for more details.
Change User’s Home Permissions for Privacy
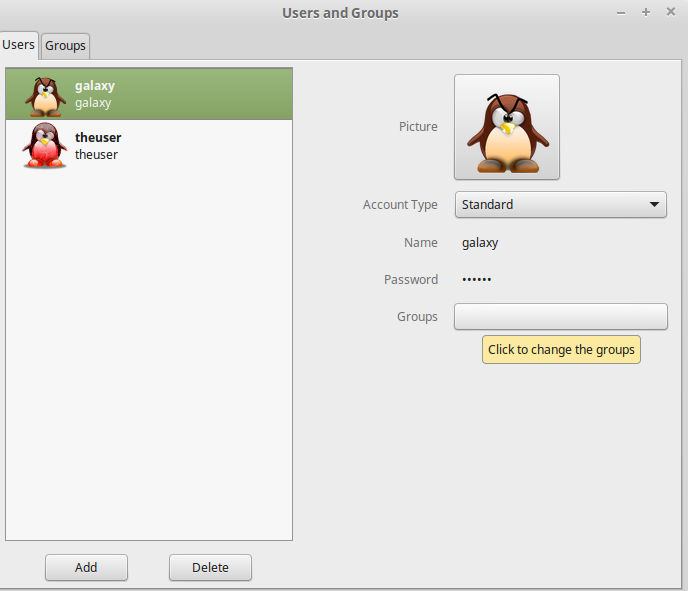
User galaxy has a home, he can log in with PASSWORD, and he has a copy of /etc/skel. So far, so good.
However, other users on the system can browse his home. Even though nobody can delete or modify galaxy’s files, others can still snoop. Let’s change that.
sudo chmod 700 /home/galaxy
This changes the permissions for galaxy from 755 (rwxr-xr-x) to 700 (rwx——). Only galaxy and root can browse galaxy’s home. Doing this for each user keeps users out of each other’s home.
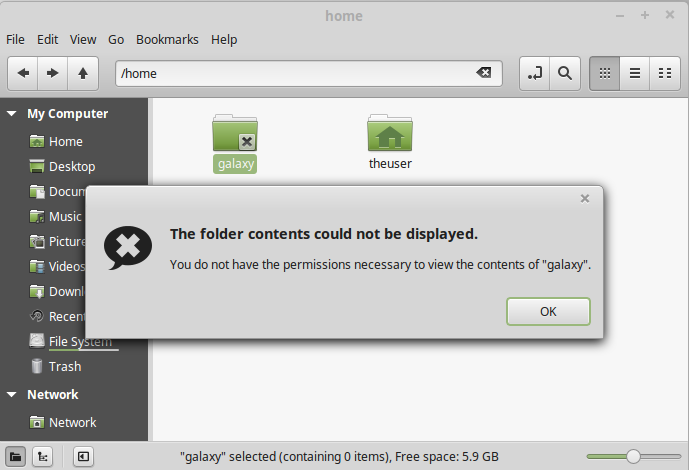
With rwx—— permissions, only the user can access his own home. Other users are denied access with this dialog. This must be set for each user’s home. A home you do not have permissions to view will show an X on the icon similar to the screenshot above.
Where is the Icon on the Login Screen?
By default, Linux Mint shows a default, generic icon for a user in his profile and on the login screen.
A generic shadow man icon is used for any user without an icon specified.
No user icons specified for the users, so we see several gray shadow men.
Let’s add a user icon for the user!
For best results, use a 1:1 PNG image. 96×96 is a good size. There are two locations that store the icon for a user.
Location 1: User’s Home
Rename the image file .face, and put it in the root of the user’s home directory (the same location as .profile and .bash_history).

A red tux PNG image renamed to .face. It’s a hidden file.
The .face icon appears on the login screen.
Location 2: /var/lib/AccountsService/icons
What happens if .face is unaccessible?
This location is most important because it answers this question. If .face exists but it cannot be accessed, such as permission change as shown earlier, then the generic icon will be displayed instead.
(Same image, but it illustrates the point.) theuser has an image named .face in his home directory, but we changed the permissions on his home to 700. The login screen cannot access his .face, so a generic shadow man icon is displayed instead.
If this happens, Linux Mint Cinnamon looks for a user icon image file in /var/lib/AccountsService/icons that has the same name as the username.
Copy the same .face image file to /var/lib/AccountsService/icons and rename it to the same name as the username of the user. For example, if you have a user name galaxy, then his icon image must also be named galaxy. Do not use a filename extension.
sudo cp /home/galaxy/.face /var/lib/AccountsService/icons/galaxy
(Change to whatever username you are copying. This statement assumes you are in the user’s home directory.)
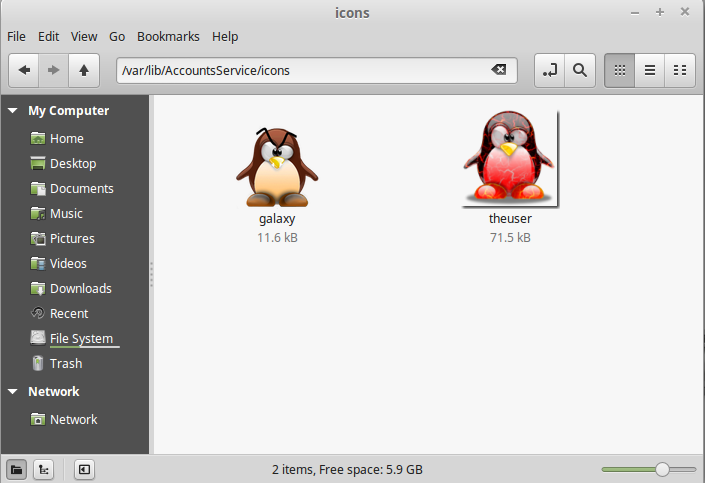
/var/lib/AccountsService/icons showing two icons for two different user accounts.
Both user accounts have their permissions set to 700 for privacy. Their .face files cannot be accessed, but we still see user icons on the login screen because these icons are being fetched from /var/lib/AccountsService/icons. By making the /var/lib/AccountsService/icons icon different from the .face icon with perssions set to 700 on home, you can have two different icons for a user: One on the login screen, and the .face icon once logged in.
Each icon in /var/lib/AccountsService/icons has the same name as its corresponding user. A 96×96 PNG is a good size, but other 1:1 image dimensions, such as 128×128 work also.
If you add a user from the Users and Groups GUI and specify a user icon, Linux Mint Cinnamon automatically adds the same icon to the two locations.
What About /var/lib/AccountsService/users ?
Inside this directory is a text file corresponding to each user. Filenames match usernames.
A file looks something like this:
[User]
Background=/home/galaxy/wallpaper/grass.jpg
Icon=/var/lib/AccountsService/icons/galaxy
SystemAccount=false
Other settings are possible, but I have found this file to be unnecessary for icon display, so I ignore it. The user’s icon still appears on the login screen without this file for the user.
Gimme More Icons!
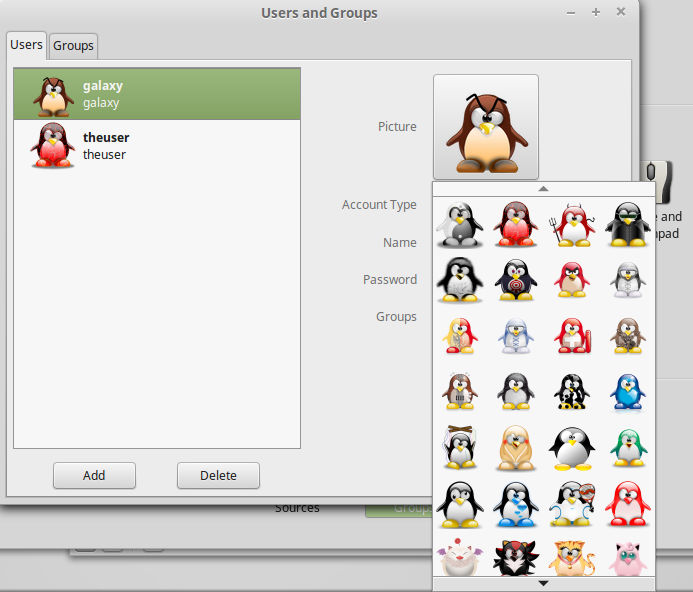
Do you know those default icons that appear when you want to set or change your user profile icon? The lion. The flower. The…whatever that is. These are the images that show up in the default dropdown list.

The default user icon set in Linux Mint 17.3 Cinnamon.
Do you want to change them? Would you like to replace them with your own?
Where are they located?
You might say “/usr/share/pixmaps/faces” and, yes, they exist there too, but those are not the icons that appear by default. That is only one of two locations. In fact, if you delete the user icons from that location, they will still appear in the dropdown list.
Linux Mint Cinnamon stores its default user icons in /usr/share/cinnamon/faces. When you click your user icon to set or change it, THESE icons appear in the list by default.
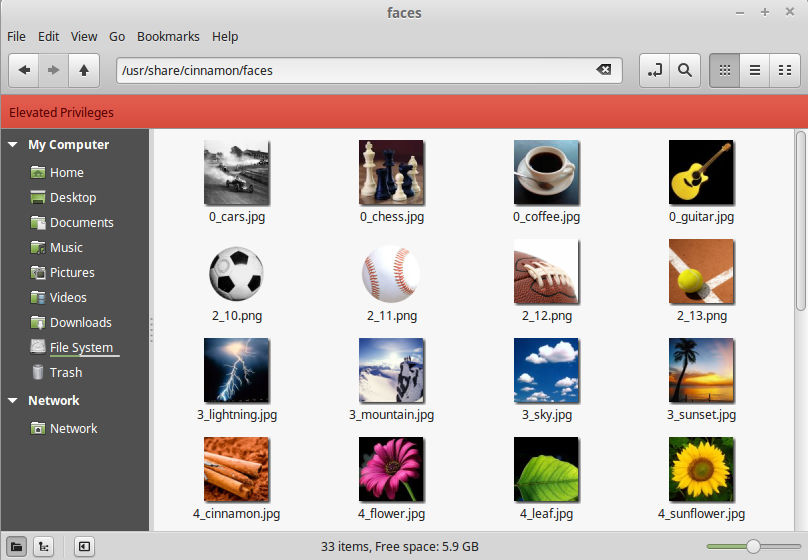
/usr/share/cinnamon/faces stores the default user icons that appear in the icon dropdown list.
If you place new user icons here, then they will appear by default in the icon list as long as they meet icon image requirements. Keep them 1:1 PNG images.

All icons (except for generic-user.png) have been deleted and replaced with tux icons in /usr/share/cinnamon/faces.
The new tux icons automatically appear if a user wishes to change his icon. Doing this makes it convenient for users to locate the available user icons.
Keep the user-generic.png image. This is the image that is used in case a user’s icon does not exist or cannot be found.
Random User Icons
If you have several user icons in /usr/share/cinnamon/faces, why not let Bash pick one at random?
USERNAME=galaxy
ICONS=(/usr/share/cinnamon/faces/*)
idx=$[ $RANDOM % ${#ICONS[@]} ]
sudo cp ${ICONS[$idx]} /home/$USERNAME/.face
This is a quick snippet that
1) USERNAME=galaxy
Specifies a username. Change USERNAME for a different user.
2) ICONS=(/usr/share/cinnamon/faces/*)
Create an array of the existing images with their full paths.
3) idx=$[ $RANDOM % ${#ICONS[@]} ]
Bash notation that gets a random index from the array of images.
4) sudo cp ${ICONS[$idx]} /home/$USERNAME/.face
Copies the chosen image to .face in the user’s home.
sudo is not needed for testing within your own home, but it is required to write to other users’ home directories.
A Script
Let’s put everything together into a script that creates one user, assigns a random icon, and changes the user’s home permission to 700 (rwx——) for privacy.
#!/bin/bash
# ----------------------------------------------------------
# Create a new user.
#
# Random Icon .face
# Must run as root
# Add files to /etc/skel
# ----------------------------------------------------------
# Change this for new user
USERNAME=whoopiejoy
SHELL=/bin/bash # Must specify a shell or user does not appear on login screen.
# Where are the user icons stored?
ICONS=(/usr/share/cinnamon/faces/*)
# Get random user icon
function getIcon
{
   idx=$[ $RANDOM % ${#ICONS[@]} ]
   echo ${ICONS[$idx]}
}
# Create new user
sudo useradd -m -p $(perl -e 'print crypt("NewPassword", "blue")') -s $SHELL "$USERNAME"
# Copy user icon to .face in new user's home
icon=$(getIcon)
sudo cp $icon /home/$USERNAME/.face
# Change permissions for privacy
sudo chmod 700 /home/$USERNAME
# Copy icon into system dir so it appears on login screen
sudo cp "/home/$USERNAME/.face" "/var/lib/AccountsService/icons/$USERNAME"
Deleting a User’s Icon
Deleting a user with userdel will not delete the icon file from /var/lib/AccountsService/icons. You must manually delete it.
sudo rm /var/lib/AccountsService/icons/galaxy
However, if you delete a user using the Users and Groups GUI, then the user’s icon will be removed from /var/lib/AccountsService/icons together with the user’s other files.
Other Issues
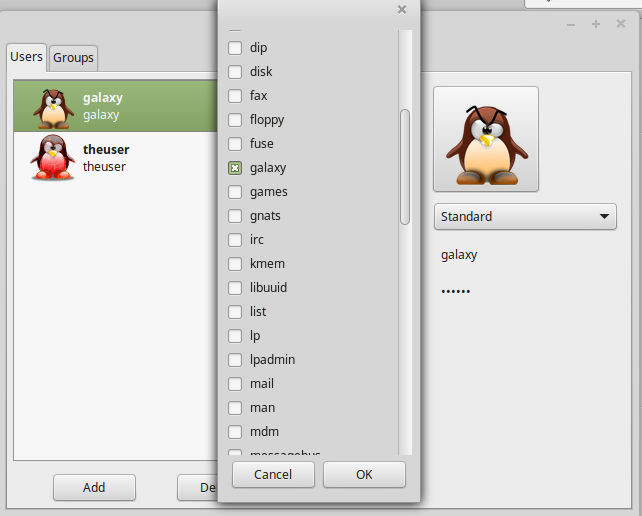
About the only issue that develops by creating a user from the command line is that the user’s primary group does not appear in the Users and Groups dialog.
No groups shown for galaxy. The account was created from the command line.
Using Users and Groups to add a user account assigns the proper group.
However, if we run id in terminal when logged in as galaxy, it shows that galaxy is a member of the galaxy group.

Logged in as galaxy user. id shows that galaxy is a member of the galaxy group.
We can always manually add galaxy to its own group in Users and Groups so it appears in the dialog, but this seems redundant when id shows that galaxy already belongs to its own primary group.
You can manually select which groups a user should be a member of in Users and Groups. The primary group is automatically added to the system when the user account is created.
Important File/Directory/Program Summary
- /etc/skel Skeleton directory. Template for new home directories.
- /etc/passwd View to check if an account has a shell.
- /etc/xdg/user-dirs.defaults Which default folders to create in a user’s home.
- xdg-user-dirs-update Updates all user home directories so they contain any new folders specified in /etc/xdg/user-dirs.defaults.
- .face A user’s icon image in the root of his home directory. Hidden file.
- /var.lib/AccountsService/icons Where the secondary user icons are stored if .face cannot be accessed. Each image file has the same name of a username without an extension.
- /usr/share/cinnamon/faces The location of the default user icons.
Conclusion
The Users and Groups GUI provides the best results, but it can be tedious to add several users. A script is more convenient, but you must handle details that Users and Groups would normally perform.
Which is best depends upon what you want to accomplish. However, learning to add users from the command line provides valuable Linux knowledge. Hopefully, this article has helped others understand (a little better) what goes on behind the scenes when a user account is created in Linux Mint Cinnamon.
Have fun!
